それでは、実際にAndroid Studioで画面デザインを作成してみましょう。
あくまでデザインだけで、内部ロジック等までは作成しません。
デザイン完成イメージ
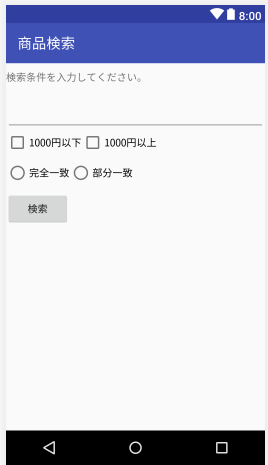
まず、サンプルとして下記の完成イメージを作っていきます。
作成の流れ
まず、画面を作成する上での流れは下記になります。
1.デザインモードで、パーツを配置する。
2.「string.xml」で、固定値を外出しする。
3.「テキストモード」で、xmlファイルを編集する。
これを見ると「デザインモード」の方が直感的だし、そちらで全て実装すればいいのでは?と思われる方もいらっしゃるかもしれませんが、「デザインモード」の場合は、変更できる属性の数が少なくて細かいレイアウトを行うことができません。
あくまで、「デザインモード」は、大雑把なレイアウトや部品配置だけ行うもので、細かい設定は「テキストモード」で行うと覚えましょう!
前提
なお、今回の手順では「3.「テキストモード」で、xmlファイルを編集する。」の説明に集中するために、「1.デザインモードで、パーツを配置」及び、「「string.xml」で、固定値を外出し」の手順は飛ばします。
もし、やり方がわからない方は、下記の記事を参照下さい。
【Android】Android Studioでの画面レイアウトの作り方~その2:レイアウト部品の使い方~、文言の出し方
実際に作ってみる。
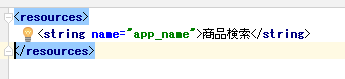
まずは、下記のように、「商品検索」とアプリ名をつけます。
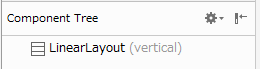
次に、レイアウトを決めます。パーツを縦に並べたいので、「LinearLayout(vertical)」を選択します。
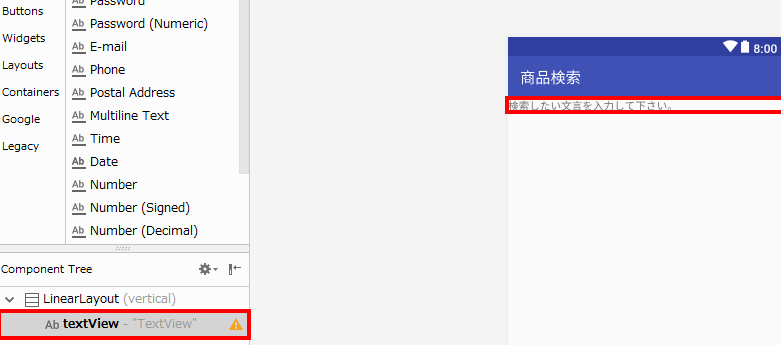
テキストビュー(textView)の設定
まずは、下記のように「TextView」を配置し、文言を設定します。
|
1 |
レイアウトファイルを「テキストモード」で見ると下記のようになります。 |
<?xml version="1.0" encoding="utf-8"?>
<LinearLayout xmlns:android="http://schemas.android.com/apk/res/android" xmlns:app="http://schemas.android.com/apk/res-auto" xmlns:tools="http://schemas.android.com/tools" android:layout_width="match_parent" android:layout_height="match_parent" android:orientation="vertical" tools:context=".MainActivity">

    <TextView android:id="@+id/textView" android:layout_width="match_parent" android:layout_height="wrap_content" android:text="TextView" tools:text="@string/searchStr" />
</LinearLayout>
「android:layout_width」が「TextView」の横幅、「android:layout_height」が縦幅ということは何となく予想がつくと思いますが、その値である属性の意味は下記です。
| 属性の値 | 説明 |
|---|---|
| match_parent | 画面いっぱいまで伸ばす。 |
| wrap_content | 表示するものに、あわせてビューサイズを変更する。 |
なので、テキストビューの見た目が横幅がいっぱいになり、縦幅が小さく表示されています。
他のパーツも設定する。
レイアウトファイル
<?xml version="1.0" encoding="utf-8"?>
<LinearLayout xmlns:android="http://schemas.android.com/apk/res/android" xmlns:app="http://schemas.android.com/apk/res-auto" xmlns:tools="http://schemas.android.com/tools" android:layout_width="match_parent" android:layout_height="match_parent" android:orientation="vertical" tools:context=".MainActivity">

    <TextView android:id="@+id/textView3" android:layout_width="match_parent" android:layout_height="wrap_content" android:layout_marginTop="10dp" android:layout_marginBottom="10dp" android:text="TextView" tools:text="検索条件を入力してください。" />

    <EditText android:id="@+id/editText" android:layout_width="match_parent" android:layout_height="wrap_content" android:layout_marginTop="10dp" android:ems="10" android:inputType="textPersonName" android:text="" />

    <LinearLayout android:layout_width="match_parent" android:layout_height="wrap_content" android:orientation="horizontal">

        <CheckBox android:id="@+id/checkBox2" android:layout_width="wrap_content" android:layout_height="wrap_content" android:text="@string/thousandLow" />

        <CheckBox android:id="@+id/checkBox" android:layout_width="wrap_content" android:layout_height="wrap_content" android:text="@string/thousandHigh" />
    </LinearLayout>

    <RadioGroup android:layout_width="match_parent" android:layout_height="wrap_content" android:layout_marginTop="10dp" android:orientation="horizontal">

        <RadioButton android:id="@+id/CompleteMatch" android:layout_width="wrap_content" android:layout_height="wrap_content" android:text="@string/CompleteMatch" />

        <RadioButton android:id="@+id/portalMatch" android:layout_width="wrap_content" android:layout_height="wrap_content" android:text="@string/portalMatch" />
    </RadioGroup>

    <Button android:id="@+id/button" android:layout_width="wrap_content" android:layout_height="wrap_content" android:layout_marginTop="10dp" android:text="Button" tools:text="@string/searchButton" />

</LinearLayout>
stringファイル
<resources> <string name="app_name">商品検索</string> <string name="searchStr">検索したい文言を入力して下さい。</string> <string name="CompleteMatch">完全一致</string> <string name="portalMatch">部分一致</string> <string name="searchButton">検索</string> <string name="thousandLow">1000円以下</string> <string name="thousandHigh">1000円以上</string> </resources>
すると、下記のような画面デザインになります。
ポイント
「チェックボックス」を横に並べる際には、「LinearLayout」の中に、配置します。
「ラジオボタン」を横に並べる場合は、「RadioGroup」の中に配置します。


この記事へのコメントはありません。