下記の記事で、DIは、Spring Frameworkのコア機能で、重要な機能ということをご紹介させて頂きました。
今回は、DIの実装を実際にやってみて、DIがどんなものか直感的に理解をしましょう。
DIの実装
DIの実装には、「Bean」と、「設定ファイル」が必要とご紹介させて頂きました。
Beanの準備
まずは、Beanを作成しましょう。何でもいいですが、下記のようにシンプルな形でBeanを用意しました。
|
1 2 3 4 5 6 7 8 9 10 11 12 13 |
public class TestBean{ private String helloworld; public String getHelloworld() { return helloworld; } public void setHelloworld(String helloworld) { this.helloworld = helloworld; } } |
設定ファイルの準備
「src/main/resources」を右クリック→New→「Spring Bean Configuration File」をクリックします。
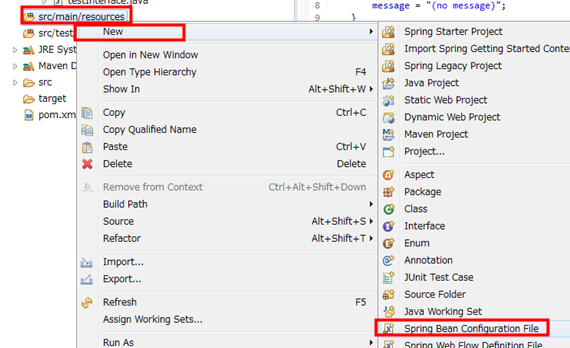
すると下記のようなファイルが作成されます。
|
1 2 3 4 5 6 |
<?xml version="1.0" encoding="UTF-8"?> <beans xmlns="http://www.springframework.org/schema/beans" xmlns:xsi="http://www.w3.org/2001/XMLSchema-instance" xsi:schemaLocation="http://www.springframework.org/schema/beans http://www.springframework.org/schema/beans/spring-beans.xsd"> </beans> |
サンプルの設定ファイルとして、下記を入力します。
|
1 2 3 4 5 6 7 8 9 10 |
<?xml version="1.0" encoding="UTF-8"?> <beans xmlns="http://www.springframework.org/schema/beans" xmlns:xsi="http://www.w3.org/2001/XMLSchema-instance" xsi:schemaLocation="http://www.springframework.org/schema/beans http://www.springframework.org/schema/beans/spring-beans.xsd"> <bean id ="beantest" class="com.springapp.TestBean"> <property name ="helloworld" value ="Hello World!" /> </bean> </beans> |
書き方としては、下記のようになります。Beanに注入する値を設定しています。
|
1 2 3 |
<bean id ="名前" class="クラス名"> <property name ="プロパティ名" value ="注入する値" /> </bean> |
実行ファイルとして、下記を用意します。
上記の設定ファイルで、idとして設定した値を指定すれば、設定ファイルから値を取り出すことができます。
|
1 2 3 4 5 6 7 8 9 10 11 12 |
import org.springframework.context.ApplicationContext; import org.springframework.context.support.ClassPathXmlApplicationContext; public class Main { public static void main(String[] args) { ApplicationContext app = new ClassPathXmlApplicationContext("bean.xml"); TestBean beantest = (TestBean)app.getBean("beantest"); System.out.println(beantest.getHelloworld()); } } |
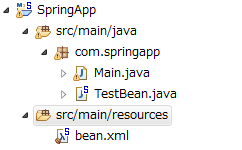
プログラムを用意した後は、下記のアプリ構成になっています。
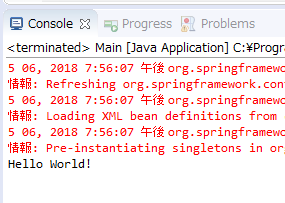
実行結果
下記のように、設定ファイルから読み込まれた文字列が、出力されていることがわかります。

この記事へのコメントはありません。