Railsアプリでは、デフォルトでアセットに含まれているCSSとJavaScriptは全て読み込むようになってしまっています。
ただ、現実としてはページごとに読み込まれるCSSとJavaScriptを変更したいということがほとんどでしょう。
作業を行う前に、事前にアセットについて不安な方は下記の記事をご確認下さい。
【Ruby on Rails】アセット(CSS,JavaScript)やマニフェストファイルの仕組み(Sprockets、Webpacker)
下記の手順で行います。
1.マニフェストファイルから、require_treeの記述を削除する。
「require_tree」は、全てのCSS、JavaScriptを読み込むという意味になっていたので、個別に変えたい場合は不要となります。
css
(Railsアプリ名)/app/assets/stylesheets/application.css
|
1 2 3 4 5 6 7 8 9 10 11 12 13 14 15 |
/* * This is a manifest file that'll be compiled into application.css, which will include all the files * listed below. * * Any CSS and SCSS file within this directory, lib/assets/stylesheets, or any plugin's * vendor/assets/stylesheets directory can be referenced here using a relative path. * * You're free to add application-wide styles to this file and they'll appear at the bottom of the * compiled file so the styles you add here take precedence over styles defined in any other CSS/SCSS * files in this directory. Styles in this file should be added after the last require_* statement. * It is generally better to create a new file per style scope. * *= require_tree .★削除する。 *= require_self */ |
JavaScript
(Railsアプリ名)/app/assets/javascripts/application.js
|
1 2 3 4 5 6 7 8 9 10 11 12 13 14 15 16 |
// This is a manifest file that'll be compiled into application.js, which will include all the files // listed below. // // Any JavaScript/Coffee file within this directory, lib/assets/javascripts, or any plugin's // vendor/assets/javascripts directory can be referenced here using a relative path. // // It's not advisable to add code directly here, but if you do, it'll appear at the bottom of the // compiled file. JavaScript code in this file should be added after the last require_* statement. // // Read Sprockets README (https://github.com/rails/sprockets#sprockets-directives) for details // about supported directives. // //= require rails-ujs //= require activestorage //= require turbolinks //= require_tree . ★削除する。 |
2.アセット用の定義ファイルに個別で読み込みたいCSSとJavaScriptを追加します。
アセット用の定義ファイル
|
1 |
(Railsアプリ)/config/initializers/assets.rb |
このファイルの設定は全ての環境で読み込まれます。下記の記述を追加します。
|
1 |
Rails.application.config.assets.precompile += %w( test.js test.css ) |
それぞれ下記のファイルが読み込み対象となっています。
| ファイルの種類 | 説明 |
|---|---|
| スタイルシート | (Railsアプリ名)/app/assets/stylesheets/test.scss |
| JavaScript | (Railsアプリ名)/app/assets/javascripts/test.coffee |
3.読み込ませるアセットファイル(SCSS、CoffeeScript)の内容を編集します。
それぞれ、下記のようなファイル内容として用意します。
css
(Railsアプリ名)/app/assets/stylesheets/test.scss
|
1 2 3 4 5 6 7 |
// Place all the styles related to the test controller here. // They will automatically be included in application.css. // You can use Sass (SCSS) here: http://sass-lang.com/ h1{ color:red; } |
JavaScript
(Railsアプリ名)/app/assets/javascripts/test.coffee
|
1 2 3 4 5 |
# Place all the behaviors and hooks related to the matching controller here. # All this logic will automatically be available in application.js. # You can use CoffeeScript in this file: http://coffeescript.org/ alert('Hello World!'); |
4.ビュー側のファイルに、読み込むアセットを設定する。
(Railsアプリ名)/app/views/test/index.html.erb
|
1 2 3 4 |
<%= stylesheet_link_tag 'test' %> <%= javascript_include_tag 'test' %> <%= @helloworld %> |
下記のように、定義ファイルに定義したスタイルシートと、JSをビューにインポートします。
以上で完了です。
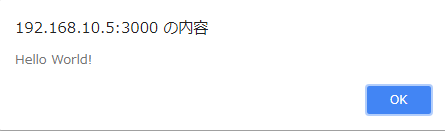
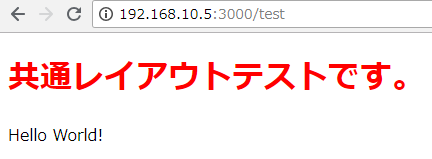
動作検証
jsが適用されている。
cssが適用されている。


この記事へのコメントはありません。